This chapter illustrates quickly how to set up a Free Pascal and SDL2 development environment within a few minutes under Linux.
Attention: The following instruction particularly work for many Debian and Ubuntu based Linux distributions (like Linux Mint used here). In general it outlines the way to go, though.
The distribution and software I used:
Linux Distribution: Linux Mint 19.3 (Ubuntu/Debian based)
Download and install FPC, FPC sourc code and Lazarus
The first step is to install the Free Pascal compiler (version 3.0.4 or higher), the Compiler’s source code (same version as the compiler) and the Lazarurs IDE (version 2.0.6 or higher). To get the most recent, stable environment, download these three files from the official Lazarus website: https://www.lazarus-ide.org/index.php?page=downloads.
Important: Do not intermix FPC or Lazarus installs from the package manager. This will lead to troubles because these installs are not compatible. Purge any of these installs. Use, e.g.:
Choose one of the “Linux DEB Releases” according to your system (32 bit or 64 bit). Most probably your running on a 64 bit system, which is the standard case for Linux.
In case of a 64 bit system download these three files:
fpc-laz_3.0.4-1_amd64.deb
fpc-src_3.0.4-2_amd64.deb
lazarus-project_2.0.6-0_amd64.deb
The download page looks somewhat like this:
SourceForge download page for all three files necessary. The original description is kept in the image.
If you downloaded these three files successfully, you run them in the same order! First FPC, then FPC’s sources and finally Lazarus.
If everything went right, Lazarus can be started up by typing “startlazarus” in the terminal or by finding the program in the application menue.
Start up Lazarus the first time
On start up of Lazarus the directories for FPC and the FPC source code were found and set already. As a hint I show where these are located on my system:
FPC: /usr/bin/fpc
FPC Source code: /usr/share/fpcsrc/3.0.4 (because $(FPCVER) equals the version number, see screenshot)
The configurations screen may look somewhat different to the screen of the following screenshot, but that is because the screenshot is outdated a bit.
Either detected automatically or can be manually added by Tools > Options …
Before proceeding, my suggestion is to simply compile the project (press F9 in Lazarus) which is presented to you. It should compile and show the form.
Get the SDL2 units
Get the latest version of the translated SDL2 units.
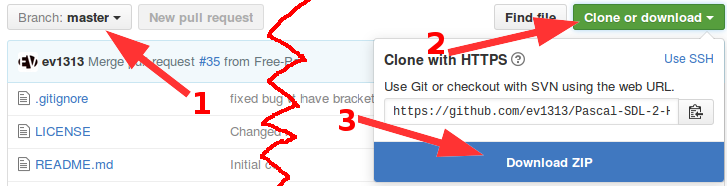
Choose the master branch (1), click on “Clone or download” (2) and click on Download ZIP (3).
Make sure you have the master branch chosen and then click on “Clone or download”, then “Download ZIP”.
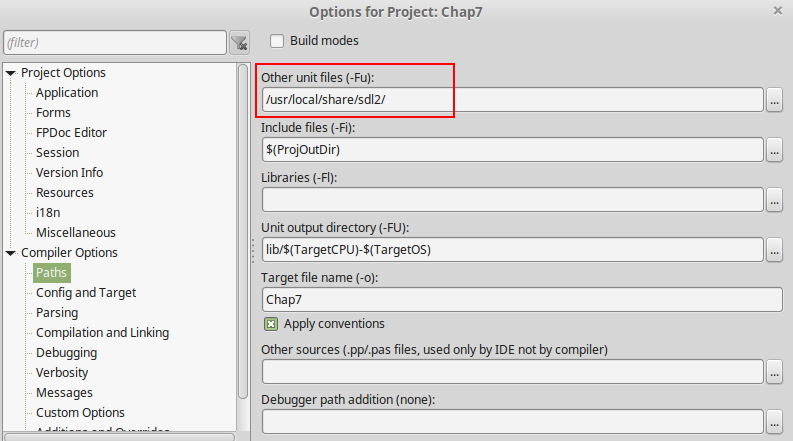
After extracting the ZIP file I suggest to rename the new folder into “sdl2” or “SDL2” and place it at any location, perhaps your development folder, e.g.:
(DO NOT use the suggested folder in the screenshot)
This folder is suggested as a place for the SDL2 units (DO NOT use this folder!). By the way, “Chap7” is just a random name for this project and you may have anything else there instead (I was trying out Chapter 7 tutorial code).
Get the SDL2 shared object files
If you are looking for the most recent pre-compiled SDL2 dynamic link library files (e.g. libSDL2.so) on the official SDL2 website, you just find a remark that reads like this:
Linux:
Please contact your distribution maintainer for updates.
Since SDL2 is very widespread it is very likely that your distribution maintainer already included the files.
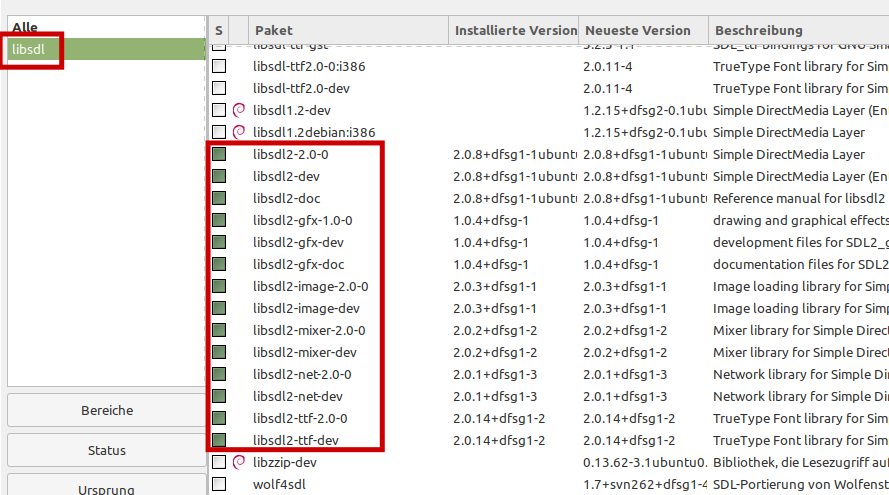
Find SDL2 and all necessary libraries in your distribution’s package manager, here it is the synaptic package manager. Look for libsdl and install every package shown in the screenshot:
Find all necessary libraries and install them. These you should install:
libsdl2
libsdl2-dev
libsdl2-gfx
libsdl2-gfx-dev
libsdl2-image
libsdl2-image-dev
libsdl2-mixer
libsdl2-mixer-dev
libsdl2-net
libsdl2-net-dev
libsdl2-ttf
libsdl2-ttf-dev
The dev-packages are necessary to compile SDL2 applications. The other packages are necessary to run SDL2 applications.
The version of these libraries does not necessarily need to be the most recent unfortunately. If you really need the most recent versions here, you may try to contact the maintainer to ask to update the version.
Congratulation! After that, everything should run smoothly :-)!
Good news, Chapter 10 has been released right now! You ever wondered what to do if you would like to create 3d graphics for a game or application? – Well, you go for modern OpenGL. And SDL 2.0 is probably the best and most convenient way to go for modern OpenGL nowadays, even professionals typically use SDL as powerful assistant for their OpenGL applications. Learn more about the strong relationship between SDL and OpenGL in Chapter 10. – And learn how it’s done, of course ;-).
Chapter 3 got a short explanation now on how to copy the source code of a chapter. In the SDL 1.2 chapters the source code was shipped for each chapter as Pascal file. Nowadays it is much more convenient to grab the source code (or just the desired parts) by copying it directly from the chapter’s source code boxes (in the browser) and paste it whereever it is needed.
The transfer of the old website has been finished. Nearly the complete content is in some way or another transfered to the new page. For example, all tutorial pages (even the old ones) are still available. Some downloads are integrated at the corresponding tutorial pages now, so they are not lost. Some pages are gone, these are Downloads, Tables and Links. These pages are of no benefit anymore since their information are now provided at the corresponding place instead of separate pages. Nevertheless, links trying to access these pages are redirected to the main page to prevent broken links.
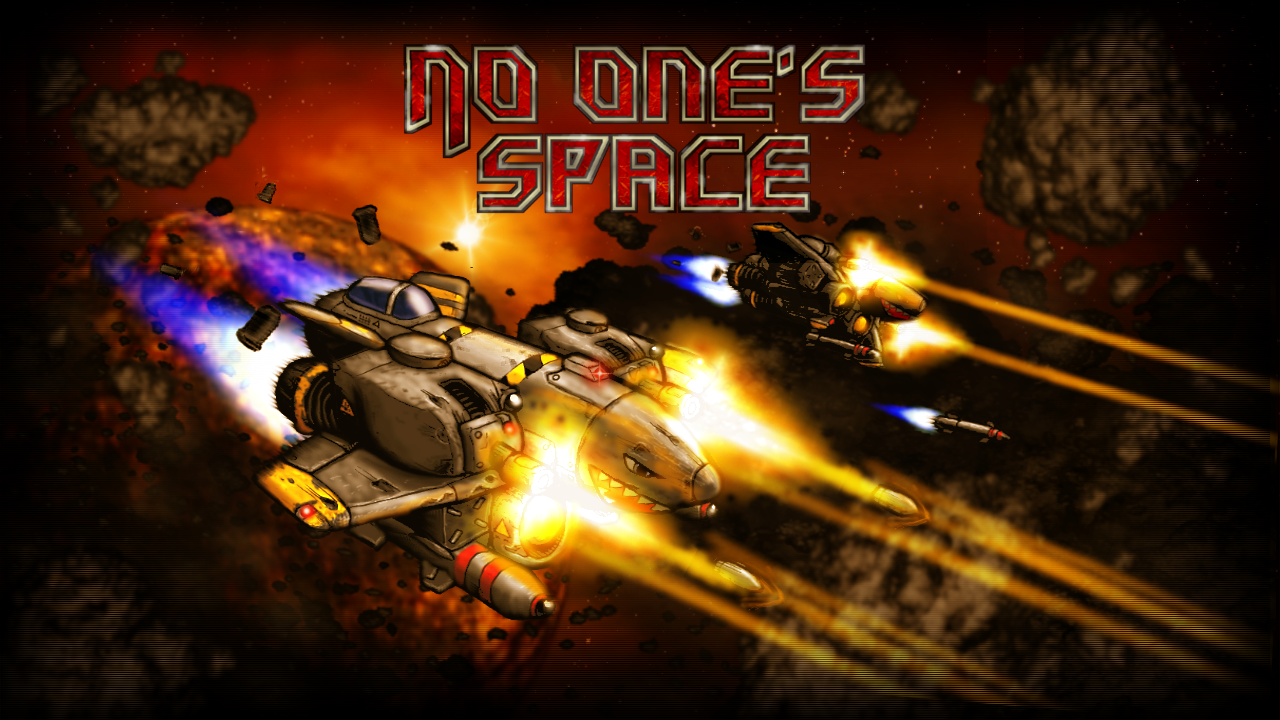
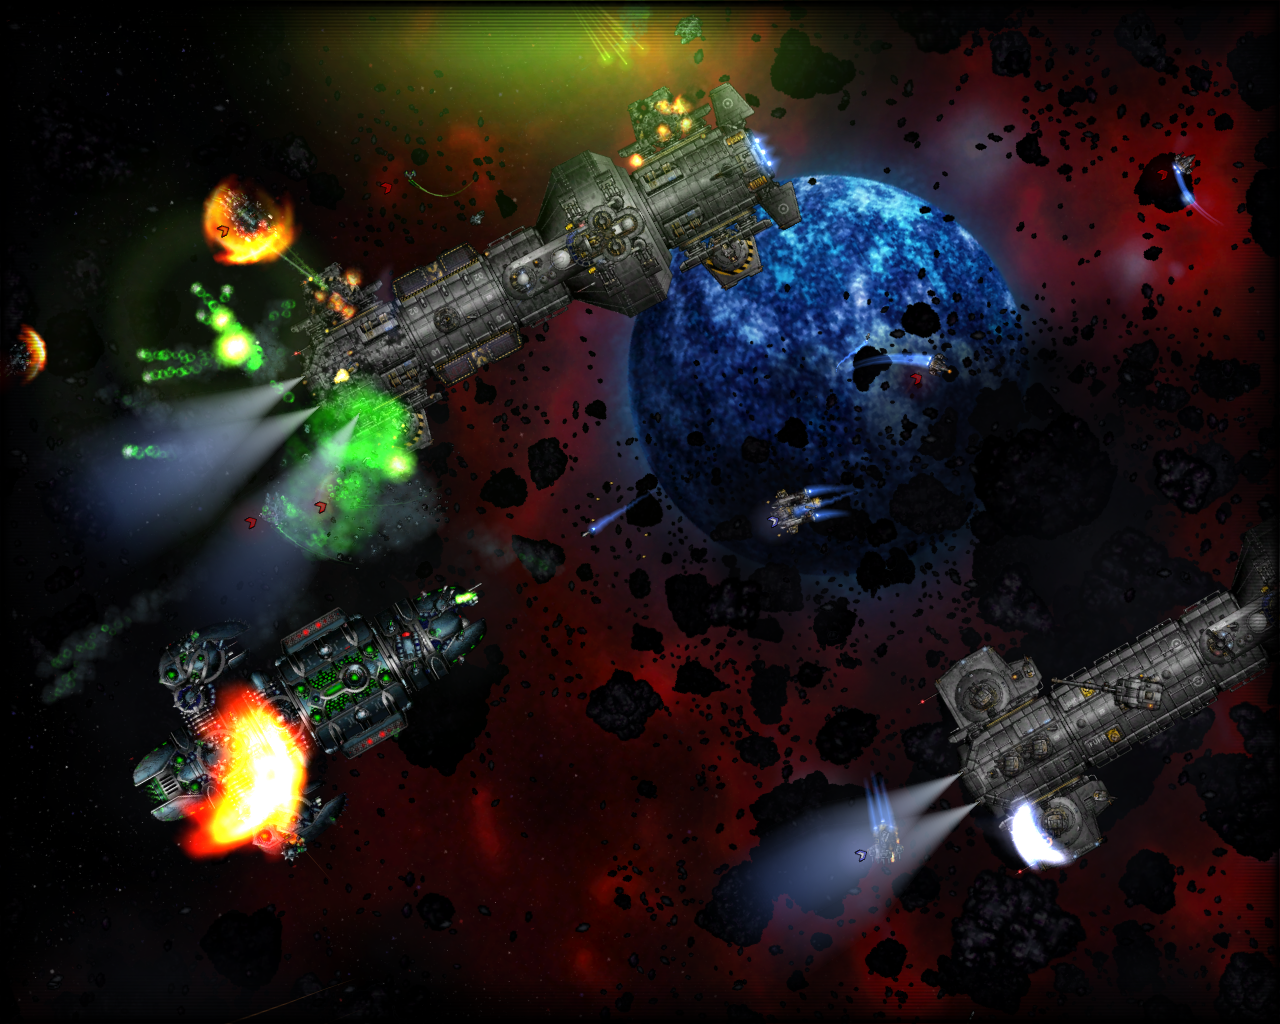
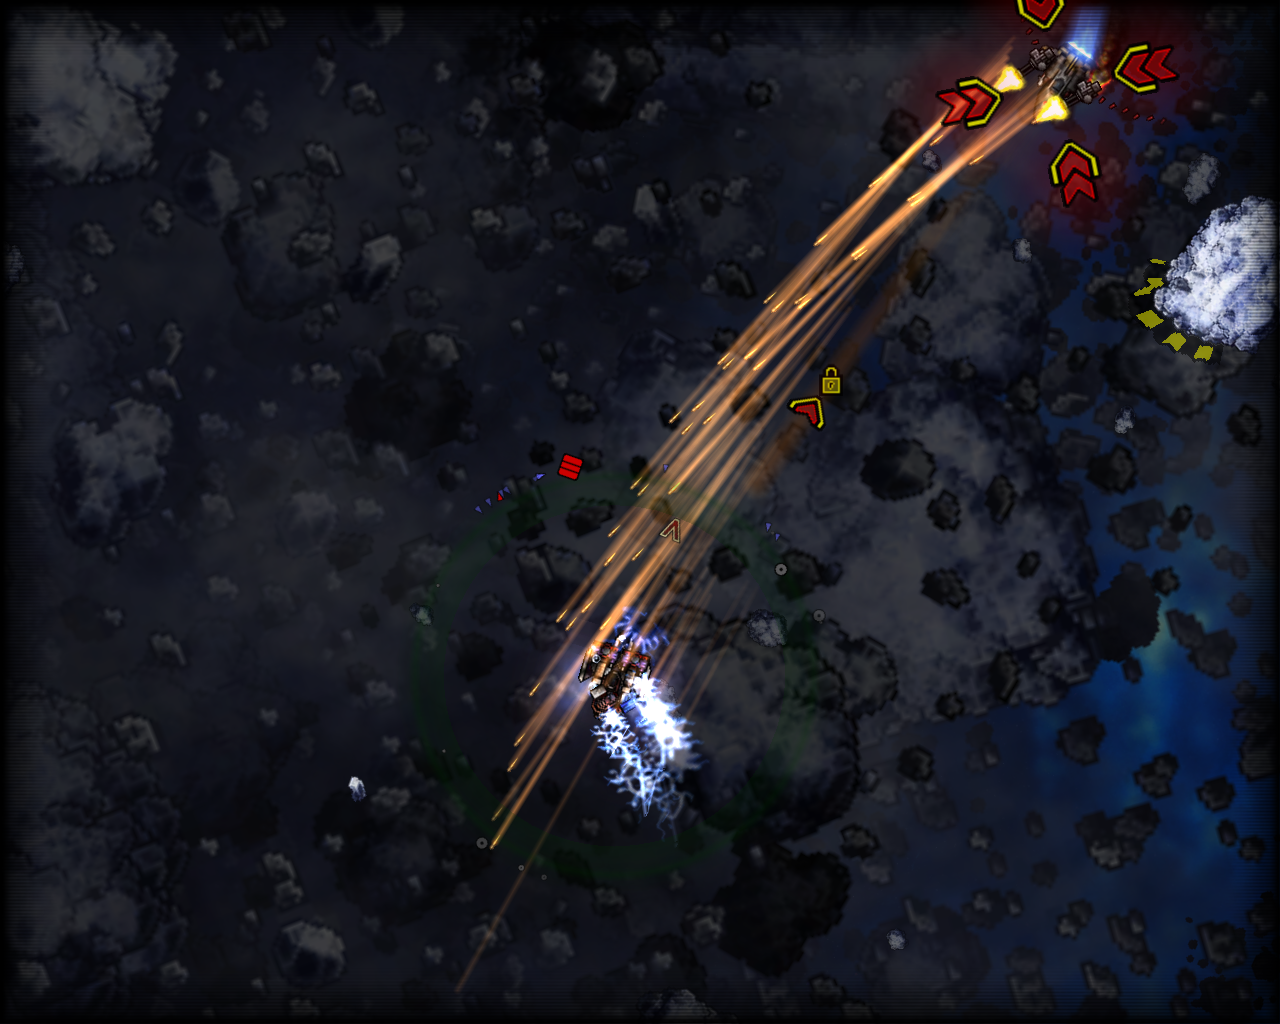
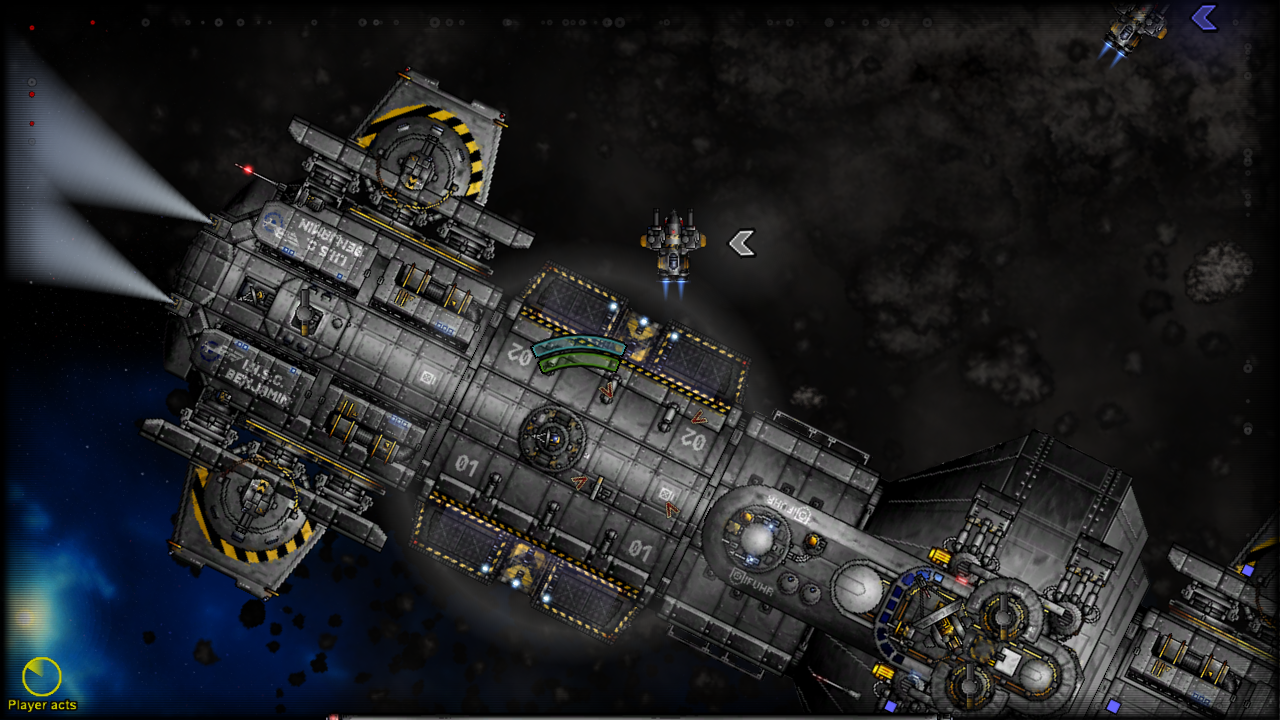
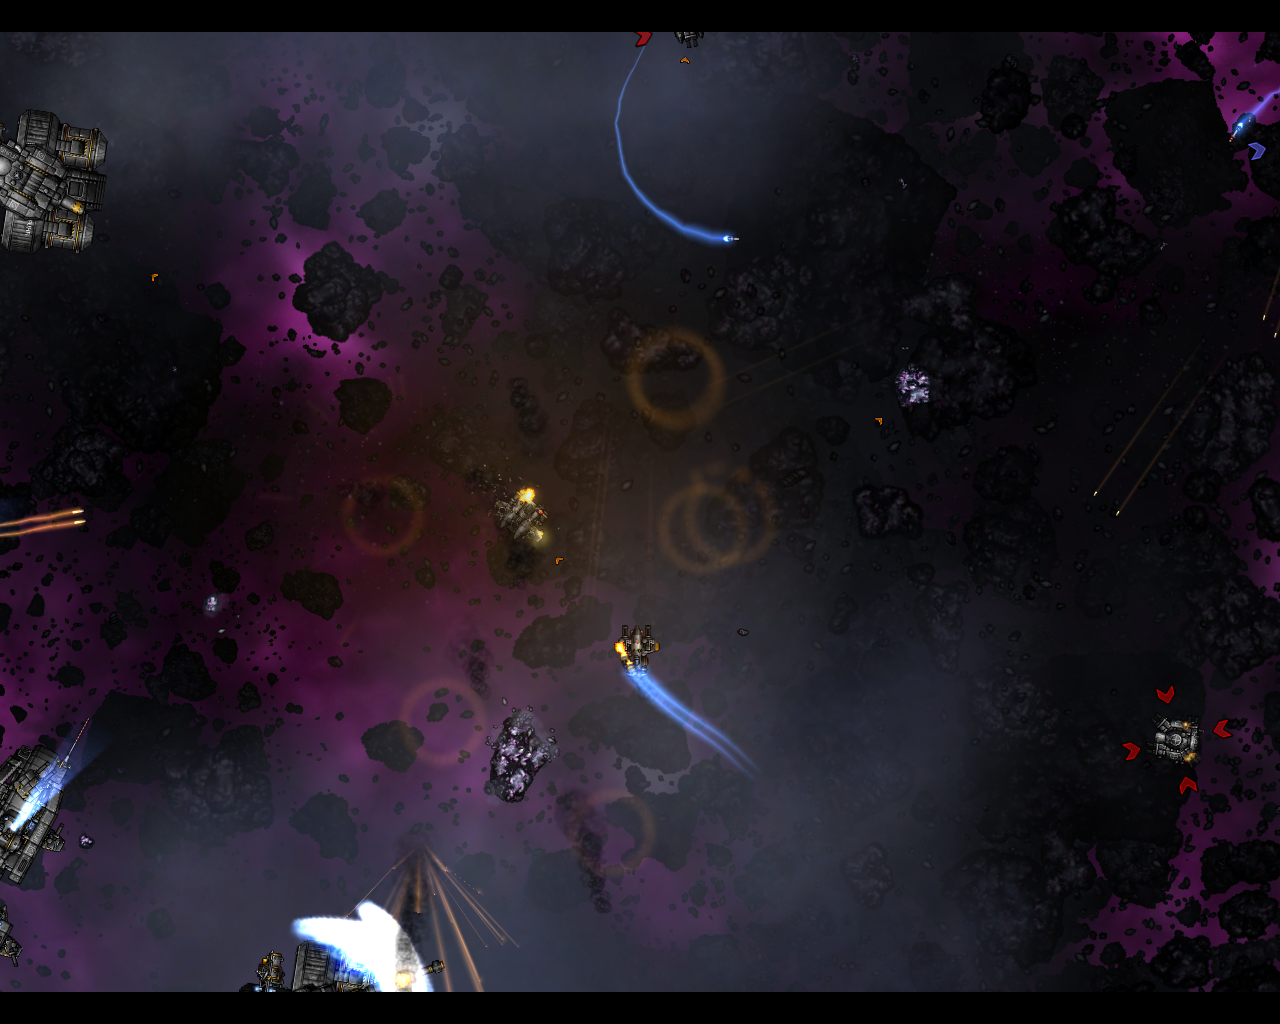
No One’s Space got greenlit. This means that this Free Pascal/SDL game will be available in Steam for purchase soon. It demonstrates the power of Free Pascal and SDL.
Small update of some subdomain settings. Subdomain links work again.
This chapter will introduce you on how to combine the SDL library with the famous Open Graphics Library (OpenGL).
What is OpenGL?
OpenGL is the first choice when it comes to platform independent 2d and 3d graphics programming. The emphasis is on graphics programming only though!
Why and when to combine SDL and OpenGL?
SDL is an excellent choice if you need platform independent 2d graphics. OpenGL is capable of 2d graphics, too, but why using the more complicated library if you could use the easy to use SDL library? – And by the way, underneath SDL is actually using OpenGL (or similar libraries depending upon the system) to achieve its hardware accelerated 2d graphics.
However, if your project needs 3d graphics, which isn’t covered by SDL, you can set up your system for this quite easy with SDL. The setup of an OpenGL environment is very easy and platform independent with SDL. Without SDL you would’ve to write different code to set up OpenGL for each operating system. In fact, even professional developers use SDL to set up their OpenGL applications.
Furthermore, since OpenGL is a pure graphics library, any other task is further done by SDL (e.g. keyboard handling, sound,…).
At this point I’d like to quote Klaus Vor der Landwehr (professional developer) from Turtle-Games, who described the relation of SDL and OpenGL in a very clear way.
Although the graphics are often in the foreground, it is for me as a game programmer only one aspect of many with which I have to deal. And the graphics do not even require the most work. OpenAL for example costs much more time and effort if you want to build a 3D sound channel management. And there are many other interfaces. Here is a list of categories in which SDL has been a great help:
As of version 2.0 of OpenGL, the so-called fixed pipeline has been replaced by a programmable pipeline (modern OpenGL). In general, the pipeline makes your input data appear on the screen in a hardware accelerated manner by using your graphics card. For the fixed pipeline it was easy to draw something to the screen but, as the name suggests, it was quite fixed and unflexible. The programmable pipeline which is controlled by a newly introduced shader (script) language is far more flexible, though, the ease is gone :-D.
Anyway, some people refer to OpenGL version 3.0 and up as modern OpenGL. This is because a lot of typical functionality was deprecated as of this version. The backwards compatibility is gone.
In this chapter I will demonstrate how to use SDL 3.0 and up to set up a modern OpenGL environment using some basic shaders. I based the description heavily on an excellent C++ tutorial over at opengl-tutorial.org and their second chapter. You may look for further OpenGL stuff there or have a look at this WikiBook OpenGL Introduction (C++). I’m not aware of OpenGL tutorials for Free Pascal or Delphi treating modern OpenGL (let me know if you know).
OpenGL Pascal units (headers)
Similar to SDL 2.0, you need specific units which translate and connect your code to the OpenGL library. There is a native OpenGL unit GL which covers the main functionality of OpenGL. Additionally for modern OpenGL you need the unit GLext which covers the functionality up to OpenGL version 4.0. These units are shipped right along with the Free Pascal compiler.
In case you are interested in support of OpenGL version 4.4, you should look into the dglOpenGL.pas. This unit is not shipped natively along with the Free Pascal compiler.
Let the fun begin
Let’s have a look at the code:
program chap10_SDL2;
uses Classes, SysUtils, SDL2, GL, GLext;

const
  vertexShaderFile = 'VertexShader.txt';
  fragmentShaderFile = 'FragmentShader.txt';
  triangleData: array[0..8] of GLfloat = ( -1.0, -1.0, 0.0,
                                            1.0, -1.0, 0.0,
                                            0.0,  1.0, 0.0  );

var
sdlWindow1: PSDL_Window;
sdlGLContext1: TSDL_GLContext;
i: Word;
VertexArrayID: GLuint;
triangleVBO: GLuint;

VertexShaderID: GLuint;
VertexShaderCode: PGLchar;
FragmentShaderID: GLuint;
FragmentShaderCode: PGLchar;
ShaderCode: TStringList;
ProgramID: GLuint;
compilationResult: GLint = GL_FALSE;
InfoLogLength: GLint;
ErrorMessageArray: array of GLChar;

begin
  if SDL_Init( SDL_INIT_VIDEO ) < 0 then HALT;

  //get an OpenGL window and create OpenGL context
  sdlWindow1 := SDL_CreateWindow( 'OpenGL window', 50, 50, 500, 500, SDL_WINDOW_OPENGL );
  if sdlWindow1 = nil then HALT;

  sdlGLContext1 := SDL_GL_CreateContext( sdlWindow1 );
  if @sdlGLContext1 = nil then HALT;

  //init OpenGL and load extensions
  if Load_GL_VERSION_4_0 = false then
    if Load_GL_VERSION_3_3 = false then
      if Load_GL_VERSION_3_2 = false then
        if Load_GL_VERSION_3_0 = false then
        begin
          writeln(' ERROR: OpenGL 3.0 or higher needed. '); readln;
          HALT;
        end;

  //print out OpenGL vendor, version and shader version
  writeln( 'Vendor: ' + glGetString( GL_VENDOR ) );
  writeln( 'OpenGL Version: ' + glGetString( GL_VERSION ) );
  writeln( 'Shader Version: ' + glGetString( GL_SHADING_LANGUAGE_VERSION ) );

  //create Vertex Array Object (VAO)
  glGenVertexArrays( 1, @VertexArrayID );
  glBindVertexArray( VertexArrayID );

  //creating Vertex Buffer Object (VBO)
  glGenBuffers( 1, @triangleVBO );
  glBindBuffer( GL_ARRAY_BUFFER, triangleVBO );
  glBufferData( GL_ARRAY_BUFFER, SizeOf( triangleData ), @triangleData, GL_STATIC_DRAW );

  //creating shaders
  VertexShaderID := glCreateShader( GL_VERTEX_SHADER );
  FragmentShaderID := glCreateShader( GL_FRAGMENT_SHADER );

  //load shader code and get PChars
  ShaderCode := TStringList.Create;
  ShaderCode.LoadFromFile( VertexShaderFile );
  VertexShaderCode := ShaderCode.GetText;
  if VertexShaderCode = nil then HALT;
  ShaderCode.LoadFromFile( FragmentShaderFile );
  FragmentShaderCode := ShaderCode.GetText;
  if FragmentShaderCode = nil then HALT;
  ShaderCode.Free;

  //compiling and error checking vertex shader
  write('Compiling and error checking Vertex Shader... ' );
  glShaderSource( VertexShaderID, 1, @VertexShaderCode, nil );
  glCompileShader( VertexShaderID );

  glGetShaderiv( VertexShaderID, GL_COMPILE_STATUS, @compilationResult );
  glGetShaderiv( VertexShaderID, GL_INFO_LOG_LENGTH, @InfoLogLength );
  if compilationResult = GL_FALSE then
  begin
    writeln( 'failure' );
    SetLength( ErrorMessageArray, InfoLogLength+1 );
    glGetShaderInfoLog( VertexShaderID, InfoLogLength, nil, @ErrorMessageArray[0] );
    for i := 0 to InfoLogLength do write( String( ErrorMessageArray[i] ) );
    writeln;
  end else writeln( 'success' );

  //compiling and error checking fragment shader
  write('Compiling and error checking Fragment Shader... ' );
  glShaderSource( FragmentShaderID, 1, @FragmentShaderCode, nil );
  glCompileShader( FragmentShaderID );

  glGetShaderiv( FragmentShaderID, GL_COMPILE_STATUS, @compilationResult );
  glGetShaderiv( FragmentShaderID, GL_INFO_LOG_LENGTH, @InfoLogLength );
  if compilationResult = GL_FALSE then
  begin
    writeln( 'failure' );
    SetLength( ErrorMessageArray, InfoLogLength+1 );
    glGetShaderInfoLog( VertexShaderID, InfoLogLength, nil, @ErrorMessageArray[0] );
    for i := 0 to InfoLogLength do write( String( ErrorMessageArray[i] ) );
    writeln;
  end else writeln( 'success' );

  //creating and linking program
  write('Creating and linking program... ' );
  ProgramID := glCreateProgram();
  glAttachShader( ProgramID, VertexShaderID );
  glAttachShader( ProgramID, FragmentShaderID );
  glLinkProgram( ProgramID );

  glGetShaderiv( ProgramID, GL_LINK_STATUS, @compilationResult );
  glGetShaderiv( ProgramID, GL_INFO_LOG_LENGTH, @InfoLogLength );
  if compilationResult = GL_FALSE then
  begin
    writeln( 'failure' );
    SetLength( ErrorMessageArray, InfoLogLength+1 );
    glGetShaderInfoLog( VertexShaderID, InfoLogLength, nil, @ErrorMessageArray[0] );
    for i := 0 to InfoLogLength do write( String( ErrorMessageArray[i] ) );
    writeln;
  end else writeln( 'success' );

  for i := 0 to 400 do
  begin
    glClearColor( 0.0, 1.0-i/400, 0.0+i/400, 1.0 );
    glClear( GL_COLOR_BUFFER_BIT );
    glUseProgram( ProgramID );
    glEnableVertexAttribArray( 0 );
    glBindBuffer( GL_ARRAY_BUFFER, triangleVBO );
    glVertexAttribPointer( 0, 3, GL_FLOAT, GL_FALSE, 0, nil );
    glDrawArrays( GL_TRIANGLES, 0, 3 );
    glDisableVertexAttribArray( 0 );
    SDL_Delay( 20 );
    SDL_GL_SwapWindow( sdlWindow1 );
  end;

  //clean up
  glDetachShader( ProgramID, VertexShaderID );
  glDetachShader( ProgramID, FragmentShaderID );

  glDeleteShader( VertexShaderID );
  glDeleteShader( FragmentShaderID );
  glDeleteProgram( ProgramID );

  StrDispose( VertexShaderCode );
  StrDispose( FragmentShaderCode );

  glDeleteBuffers( 1, @triangleVBO );
  glDeleteVertexArrays( 1, @VertexArrayID );

  SDL_GL_DeleteContext( sdlGLContext1 );
  SDL_DestroyWindow( sdlWindow1 );

  SDL_Quit;
end.
Wow that is a lot of code. What you will get is this:
The background will change slowly from green to blue. And you will get this:
The vendor, OpenGL version and shader version information will be different according to your system. Also, if your system doen’t support the needed OpenGL version you’ll not have “success” but rather “failure” after the compiling and linking processes. Additional information may be shown then.
The program is called “chap10_SDL2” for obvious reason.
Additionally to the SDL2 unit we load the native FPC units Classes (for TStringList support), SysUtils (for PChar functions) and GL and GLext for OpenGL support.
Thre are three constants declared. The first two are defined as the filenames of the so-called shader source files. Basically they are simple text files which contain a script. More about shaders and the script later. The third is an array of nine GLfloat values. GLfloat is the OpenGL float variable type which in fact is translated as Pascal’s Single type. In short, these nine values describe three points in 3d space which, if connected, form a triangle. More about this later.
The first variable “sdlWindow1” is well known from previous chapters. Any variable to follow is new though. Most of them are related to OpenGL.
“sdlGLContext1” is of type TSDL_GLContext needed to create a so-called OpenGL context. In fact, this variable type is provided by SDL and a key type to set up an OpenGL conext in a simple and cross-platform manner.
The variable “i” is a simple Word variable for counting purposes.
OpenGL’s Integers and Strings
Most of the following variables are either of type GLuint or of type PGLchar. The last variable is an dynamic array of GLchars. Their specific meaning will be discussed later but GLuint is the OpenGL unsigned integer type (no negative values) which translates to Pascal’s Cardinal/Longword type. Text handling in OpenGL works by null-terminated strings of type PGLchar which translate to Pascal’s PChar. GLchar translates to Char then, obviously.
At this point you may wonder why as for SDL the null-terminated strings are used instead of simple strings (see Chapter 7 for the PAnsiChar variable type discussion). The answer again is that OpenGL is based upon C which handles strings this way. PChar equals PAnsiChar by the way.
The remaining variables “ShaderCode” of type TStringList will be used to handle the shader text files. “compilationResult” and “InfoLogLength” are of GLint type. In contrast to GLuint they allow for negative values.
begin
  if SDL_Init( SDL_INIT_VIDEO ) < 0 then HALT;

  //get an OpenGL window and create OpenGL context
  sdlWindow1 := SDL_CreateWindow( 'OpenGL window', 50, 50, 500, 500, SDL_WINDOW_OPENGL );
  if sdlWindow1 = nil then HALT;

  sdlGLContext1 := SDL_GL_CreateContext( sdlWindow1 );
  if @sdlGLContext1 = nil then HALT;

  //init OpenGL and load extensions
  if Load_GL_VERSION_4_0 = false then
    if Load_GL_VERSION_3_3 = false then
      if Load_GL_VERSION_3_2 = false then
        if Load_GL_VERSION_3_0 = false then
        begin
          writeln(' ERROR: OpenGL 3.0 or higher needed. '); readln;
          HALT;
        end;

  //print out OpenGL vendor, version and shader version
  writeln( 'Vendor: ' + glGetString( GL_VENDOR ) );
  writeln( 'OpenGL Version: ' + glGetString( GL_VERSION ) );
  writeln( 'Shader Version: ' + glGetString( GL_SHADING_LANGUAGE_VERSION ) );
First SDL2 is initilized as known. “sdlWindow1” is created as known by SDL_CreateWindow. Be careful though, in order to work with OpenGL the flag SDL_WINDOW_OPENGL has to be set!
SDL 2.0 and the OpenGL context
An OpenGL context is kind of an abstract name. It doesn’t represents just a window, even though it is created from a SDL2 window, but rather it contains everything (including the window information) that is related to this OpenGL context. The OpenGL context is therefore kind of “broader” than just a window, that is why it is called context rather than just a OpenGL window.
The function to create an OpenGL context from a SDL2 window is:
function SDL_GL_CreateContext(window: PSDL_Window): TSDL_GLContext
So, it is simple as that, just use the SDL2 window as argument and voila, you’ll get a OpenGL context, platform-independent. That is why everybody loves SDL2 to work with OpenGL. Note that the returned Context isn’t a pointer but an actual instance. So to error check against nil you need to refer to the instance’s addresse by the @ operator.
OpenGL version check and initialization
The nested if-then-statements check if at least version 3.0 of OpenGL is installed. If so, the highest available version is loaded. If not, the program is stopped and returns a text message.
If your hardware doen’t support OpenGL 3.0 or higher you should try to update your graphics driver. There is a good chance that you are able to use OpenGL 3.0 or higher then. Anyway, if the upgrade doesn’t work out or you wouldn’t want to update, you may have a look into the JEDI-SDL Chapter about OpenGL, there the old OpenGL is treated (although that chapter treats SDL 1.2, it shouldn’t be too hard to make it work with SDL 2.0 with minor changes).
Next there are three text messages printed out. These present the Vendor, the OpenGL version and the Shading language version. To get them in a readable form you need to transform the constants into strings by function glGetString. Let’s have a look at the command window again:
Have a look at the first three lines and you see what it could look like.
If you are new to OpenGL, OpenGL as kind of machine with many switches. Each switch
Briefly, a Vertex Array Object (VAO) is a specific OpenGL object which contains important settings (e.g. format of vertex data) and references to other objects, including Vertex Buffer Objects (VBO). Notice, it doesn’t store the object’s data (content) itself, it just stores the reference to these objects.
The Vertex Buffer Object (VBO) contains the actual data (content). In the example case these are three vertices, each described by three float point values in cartesian space.
OpenGL Object name or ID
Because it is important to understand, in contrast to SDL where objects usually are directly submitted to a function by its pointer reference, in OpenGL you have a so-called OpenGL Object name, which actually is an integer value of GLuint type. Therefore ID is a suitable name, too. Let’s see how this works:
The VAO is created by function glGenVertexArrays( number of VAO names, pointer to VAO names array ). The first parameter determines how many VAO names I’d like to create. We just need 1. The second parameter asks for a pointer to an array of VAO names. Since VAO names are just simple GLuints, it is a simple array of GLuints. Anyway, since we just need one, a pointer to a simple GLuint variable will be suitable, too. In our case that is “VertexArrayID”. To bind (“activate”) the corresponding VAO to the OpenGL context, the function glBindVertexArray( name of VAO ) is used. The argument is the name of the VAO we just created in “VertexArrayID”.
Similar to the VAO, the VBO is created by function glGenBuffers( number of VBO names, pointer to VBO names array ). Again, we just need 1 VBO whose name should be returned to “triangleVBO”. This variable just stores an ID (object name) of GLuint type.
From the naming of “triangleVBO” it is clear to us what we intent here (representing a triangle by three vertices), anyway, how should OpenGL know? – We explain the meaning of this buffer object to OpenGL by using glBindBuffer ( target, VBO name ). There are numerous options as target but GL_VERTEX_BUFFER is the right choice here.
The actual VBO is created by glBufferData( target, size of object’s data store in bytes, pointer to data to be copied into VBO, expected usage ). This functions takes four arguments. The target is GL_VERTEX_BUFFER again. The size of the VBO’s data store in bytes is determined by Pascal’s SizeOf function applied to “triangleData”. The “triangleData” constant also holds the data to be copied into the VBO, so its pointer is suitable as the third argument. Since we are not going to change the data a lot, we should use GL_STATIC_DRAW as fourth argument.
If you are a newcomer to OpenGL, don’t worry if you are confused the first time. Most people are. And now it may even get worse :-(.
Shaders and OpenGL Shading Language
When starting with modern OpenGL the so-called Shaders are talked about a lot. Shaders are scripts written in a C-like script language called OpenGL Shading Language (GLSL). These scripts are compiled at runtime and influence the way how the graphics data is processed at certain steps in the so-called rendering pipeline of OpenGL. In fact, you can create rather complex and special effects with shaders without even changing one line of code of your source code.
Vertex Shader and Fragment Shader
There are two Shaders that are crucial and have to be set up to work with modern OpenGL. They are called Vertex Shader and Fragment Shader. There are more Shaders not covered here, though. Each type of Shader influences different aspects of the rendering.
The Vertex Shader is the first Shader program executed in the rendering pipeline. Every vertex is “put through” the Vertex Shader program and processed accordingly, hence the name. Often this Shader is used to perform transformation operations. The Shader script used in this tutorial is shown next:
This GLSL source code is saved into a file VertexShader.txt and located in the same directory as the source code of this chapter’s example source code. I’m not going to explain this GLSL code in detail here, but a detailed explanation is found over at opengl-tutorial.org Chapter 2 where I got this Shader code from, by the way.
The Frgament Shader is the last Shader program executed in the renderin pipeline. The so-called rasterization process produces fragments. Every fragment is “put through” the Fragment Shader program and processed accordingly. The Shader script used for the Fragment Shader is:
#version 330 core

out vec3 color;

void main(){
   color = vec3(1,0,0);
 }
This code is in file FragmentShader.txt and located in the same directory as the VertexShader.txt. The detailed explanation is found over at opengl-tutorial.org Chapter 2 again. Anyway, you’ll notice that there is a “color” variable (three component vector). As you see, it sets the (red,green,blue) values for the fragments to (1,0,0) which means red should be the result, red = 100%, green and blue = 0%. You may play around with these values.
  //creating shaders
  VertexShaderID := glCreateShader( GL_VERTEX_SHADER );
  FragmentShaderID := glCreateShader( GL_FRAGMENT_SHADER );

  //load shader code and get PChars
  ShaderCode := TStringList.Create;
  ShaderCode.LoadFromFile( VertexShaderFile );
  VertexShaderCode := ShaderCode.GetText;
  if VertexShaderCode = nil then HALT;
  ShaderCode.LoadFromFile( FragmentShaderFile );
  FragmentShaderCode := ShaderCode.GetText;
  if FragmentShaderCode = nil then HALT;
  ShaderCode.Free;
Both Shaders are created by function glCreateShader( Shader type ). It returns the reference (or name) as GLuint as seen before for the VAO and VBO. We store them in the VertexShaderID and FragmenShaderID, respecitvely.
The next part is about loading the source code from the two Shader files (VertexShader.txt, FragmentShader.txt) and converting them to be used with OpenGL. First a “ShaderCode” variable of TStringList type is created. Its LoadFromFile method let us load the file contents into the variable conveniently. First for the Vertex Shader, whose file name is stored in constant “VertexShaderFile”. The variable “VertexShaderCode” is of type PGLchar, which is the way OpenGL handles strings. Since PGLchar is of type PChar anyway, the method GetText is perfectly suitable here to convert the source code string into a null-terminated array of chars. Finally, there is a simple check if the PGLchars are empty (nil), which shouldn’t be the case if the source code is pointed to as expected.
Exactly the same is done for the FragmentShader and the source code associated with “FragmentShaderCode”.
Finally, the dummy variable “ShaderCode” is free’d.
  //compiling and error checking vertex shader
  write('Compiling and error checking Vertex Shader... ' );
  glShaderSource( VertexShaderID, 1, @VertexShaderCode, nil );
  glCompileShader( VertexShaderID );

  glGetShaderiv( VertexShaderID, GL_COMPILE_STATUS, @compilationResult );
  glGetShaderiv( VertexShaderID, GL_INFO_LOG_LENGTH, @InfoLogLength );
  if compilationResult = GL_FALSE then
  begin
    writeln( 'failure' );
    SetLength( ErrorMessageArray, InfoLogLength+1 );
    glGetShaderInfoLog( VertexShaderID, InfoLogLength, nil, @ErrorMessageArray[0] );
    for i := 0 to InfoLogLength do write( String( ErrorMessageArray[i] ) );
    writeln;
  end else writeln( 'success' );

  //compiling and error checking fragment shader
  write('Compiling and error checking Fragment Shader... ' );
  glShaderSource( FragmentShaderID, 1, @FragmentShaderCode, nil );
  glCompileShader( FragmentShaderID );

  glGetShaderiv( FragmentShaderID, GL_COMPILE_STATUS, @compilationResult );
  glGetShaderiv( FragmentShaderID, GL_INFO_LOG_LENGTH, @InfoLogLength );
  if compilationResult = GL_FALSE then
  begin
    writeln( 'failure' );
    SetLength( ErrorMessageArray, InfoLogLength+1 );
    glGetShaderInfoLog( VertexShaderID, InfoLogLength, nil, @ErrorMessageArray[0] );
    for i := 0 to InfoLogLength do write( String( ErrorMessageArray[i] ) );
    writeln;
  end else writeln( 'success' );
To associate the source code we stored in “VertexSourceCode” to “VertexShaderID” of GLuint type, the function glShaderSource( Shader reference, number of array elements, pointer to array of source code PGLchars, pointer to array of lengths ). The Vertex Shader reference is stored in “VertexShaderID” which is the first argument. We just have one source code, so the second argument is 1. The source code is stored VertexShaderCode, and its pointer is addressed by @VertexShaderCode as the third argument. As seen before, since we just have one element here, it is not necessary to have really an array. The fourth parameter allows for some length specification, but if set to nil it expects null-terminated arrays of chars.
The compilation is straight forward done by glCompileShader( Shader reference ). It is really advised to to error checking here, that is why it is shown how to do that. The function glGetShaderiv( Shader reference, object parameter, pointer of correct type for return value ) is used to request information about objects. First we like to know if the compilation was successful. The Shader reference is stored in “VertexShaderID”, the object parameter is GL_COMPILE_STATUS. This will return a GLint value, which can be interpreted as GL_FALSE or GL_TRUE. The result is stored in “compilationResult” by using its pointer (@compilationResult) as argument.
Right after that we request the length of the information log by GL_INFO_LOG_LENGTH. It will be greater than 0 if some information were logged (probably an error occured on compilation then). The result is returned to “InfoLogLength” by its pointer @InfoLogLength.
If an error occurs, “compilationResult” is GL_FALSE. In this case “failure” along with more specific information is printed out. I’m not going into detail here, since this shouldn’t happen. Otherwise (and that should be the case), “success” is printed out.
The very same way the Fragment Shader is compiled and checked.
  //creating and linking program
  write('Creating and linking program... ' );
  ProgramID := glCreateProgram();
  glAttachShader( ProgramID, VertexShaderID );
  glAttachShader( ProgramID, FragmentShaderID );
  glLinkProgram( ProgramID );

  glGetShaderiv( ProgramID, GL_LINK_STATUS, @compilationResult );
  glGetShaderiv( ProgramID, GL_INFO_LOG_LENGTH, @InfoLogLength );
  if compilationResult = GL_FALSE then
  begin
    writeln( 'failure' );
    SetLength( ErrorMessageArray, InfoLogLength+1 );
    glGetShaderInfoLog( VertexShaderID, InfoLogLength, nil, @ErrorMessageArray[0] );
    for i := 0 to InfoLogLength do write( String( ErrorMessageArray[i] ) );
    writeln;
  end else writeln( 'success' );
The shaders have to be attached and linked by a Shader program. A Shader program is created by glCreateProgram(). The parenthesis are important here. It returns an reference of GLuint type which is stored in ProgramID.
The Shaders are attached to this Shader program by glAttacheShader( Program reference, Shader reference ). The program is linked by glLinkProgram( Program reference ). The reference for the Shader program is “ProgramID”. The references for the Shaders are “VertexShaderID” and “FragmentShaderID”, respectively.
By complete analogy to the error checking for the Shader compilation, the Shader program linking is checked. Anyway, instead of GL_COMPILE_STATUS, GL_LINK_STATUS is used.
  for i := 0 to 400 do
  begin
    glClearColor( 0.0, 1.0-i/400, 0.0+i/400, 1.0 );
    glClear( GL_COLOR_BUFFER_BIT );
    glUseProgram( ProgramID );
    glEnableVertexAttribArray( 0 );
    glBindBuffer( GL_ARRAY_BUFFER, triangleVBO );
    glVertexAttribPointer( 0, 3, GL_FLOAT, GL_FALSE, 0, nil );
    glDrawArrays( GL_TRIANGLES, 0, 3 );
    glDisableVertexAttribArray( 0 );
    SDL_Delay( 20 );
    SDL_GL_SwapWindow( sdlWindow1 );
  end;
The for-loop counts from 0 to 400. Within each cycle it first changes the background color by glClearColor( red, green, blue, alpha ). Red and alpha are constant, green and blue are varied each cycle dependend upon variable i. This makes the background slowly changing from green to blue, feel free to play around with the rgba values. To actually clear the color buffer glClear( buffer ) with GL_COLOR_BUFFER_BIT as argument is used.
glUseProgram( Shader program reference ) is used to apply the Shader program to the rendering state. “ProgramID” is the Shader program reference in the example code.
glEnableVertexAttribArray( array index ) is used in order to make the attribute array available for rendering by glDrawArrays. The index is 0 here. The “triangleVBO” is bound by glBindBuffer( target, buffer ) to the GL_BUFFER_ARRAY target to change attribute data of said VBO. Latter is done by glVertexAttribPointer( index, size, type, normalized, stride, offset of first component ) with the given arguments. Hence, the index is 0, 3 components per generic vertex attribute, each of float point type (thus, GL_FLOAT), not normalized (thus GL_FALSE), no strides between vertex attributes, no offset for the first component.
The rendering is done by glDrawArrays( type of primitive, starting index, number of elements ). The type of primitive is a triangle, hence GL_TRIANGLES is the first argument. We start at the very beginning, so index is 0. We have 3 sequential elements (vertices).
glDisableVertexAttribArray( array index ) is the counter function to glEnableVertexAttribArray( array index ), obviously. It disables the vertex attribute array.
SDL_Delay delays the loop by 20 milliseconds.
The procedure
procedure SDL_GL_SwapWindow(window: PSDL_Window)
is used to actually display the rendering result to the the window “sdlWindow1”. Keep in mind that this window has to be initialized as an OpenGL window. This procedure is comparable to SDL’s SDL_RenderPresent.
For the clean up, the shaders have to be detached from the shader program by glDetachShader( program, shader ). After that they can be deleted by glDeleteShader( shader ), and the program by glDeleteProgram( program ).
The shader script PChars are disposed by StrDispose( PChar ).
The VBO and the vertex array have to be free’d by glDeleteBuffers( number of buffer objects, pointer to array of buffers ) and glDeleteVertexArrays( number of VAOs, pointer to array of VAOs ) respectively. The first parameter is the number of objects to be deleted, which is 1 in both our cases.
The No One’s Space SDL game has been added to the SDL Project page. It is the first commercial title added and Klaus Vor der Landwehr (from Turtle-Games) has kindly provided an interview for us. Feel free to support the game in the greenlight state over at Steam. This game demonstrates that Free Pascal and SDL make games of commercial quality possible.
Interview with Klaus Vor der Landwehr from Turtle-Games
Could you please give a short description of No One’s Space for those who have never heard of it?
Klaus Vor der Landwehr: No One’s Space (NOS) is a single-player Retro 2D-Science-Fiction-Shooter with modern physics. It was created as a cross-breed of the classic games Wing Commander I and Star Control II. In NOS, the player experiences a cosmic conflict between four powerful races, taking the role of different heroes. In 54 challenging missions, reaching from manageable duels to large combats, the player controls a variety of vessels and has to go all out to improve his skills to master them all.
Why did you decide to choose Pascal as a programming language and SDL/SDL2 as a library for this project?
Klaus Vor der Landwehr: It wasn’t really a choice. I’m used to Pascal since my school days. I’m a self-taught. I like it.
What do you think is the most interesting Pascal/SDL/SDL2 project out there (besides your own, of course :-D)?
Klaus Vor der Landwehr: Hm, as far as it concerns the programming language, games are rarely tagged. But I’ve seen some impressive stuff right here: Projekt “W” – Phase 2 http://www.saschawillems.de/?page_id=829 (Although I can only assume that it uses SDL).
Are there any further steps for No One’s Space and/or are any new projects planned? What will they be?
Klaus Vor der Landwehr: If the game gets Greenlit, we want to release it on Steam this year (early access) and work further on it.
A new page has been set up which gives an overview of projects done in SDL with Pascal (any dialect). The projects may be games, interpreters, libraries, anything. Of course SDL should play a key role and shouldn’t be just used to set up an OpenGL window (or similar). If possible I try to have an interview with the creator of the project.
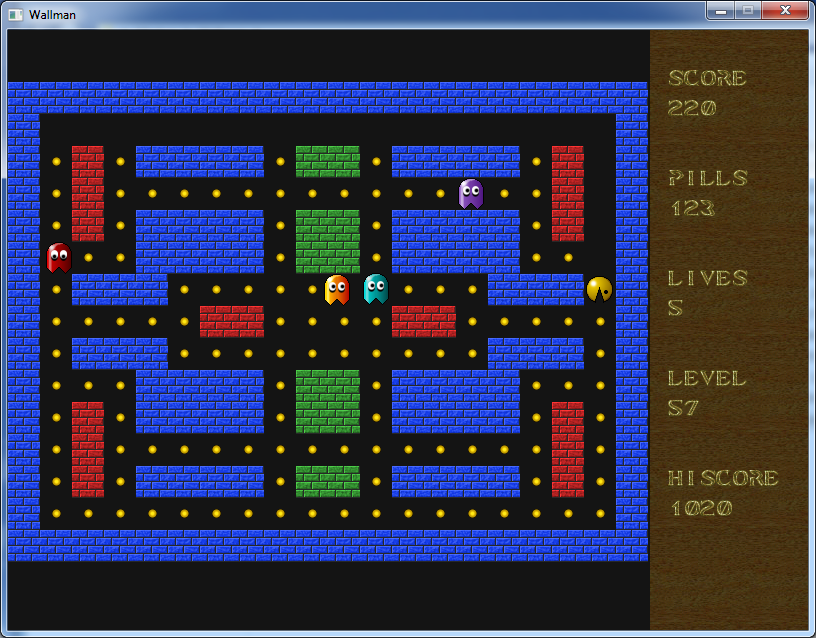
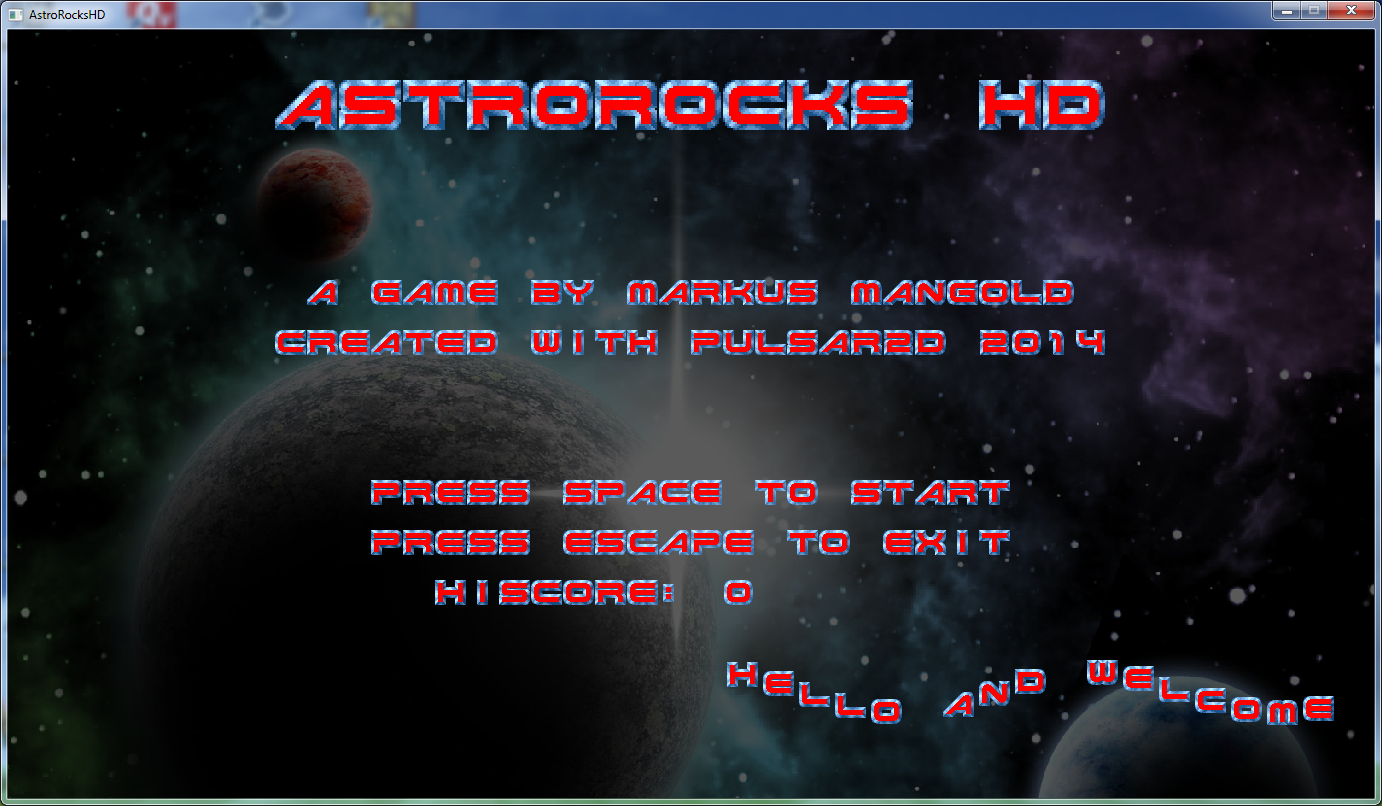
The first project listed is the famous EGSL project and its successor Pulsar2D. Both have been created by Cybermonkey who kindly gave an interview and provided a lot of screenshots to me.
Feel free to contact me to let me know about other Pascal SDL projects.
Edit: As of 09/02/2016 I added suve’s Alexland and Colorful to the project page. Thanks for the interview and the screenshots.
Could you please give a short description of EGSL and Pulsard2D for those who have never heard of it?
Cybermonkey: EGSL (Easy Game Scripting with Lua) is a Lua interpreter which allows one to code 2D games in a simple way. I could say in a “classical way” because EGSL is inspired by old BASIC dialects. The main difference between EGSL and Pulsar2D is that Pulsar2D uses now the newer SDL2 libraries (which gives us the possibility to use multiple windows). It’s as easy as that: write 10 lines of Lua code and start the script and you’ll have already a small sprite moving example. Of course it is possible to use the framework with FreePascal. Apart from that I recently ported the Pulsar2D framework to FreeBASIC. So one can code Pulsar2D games/demos whatsoever in Lua, FreePascal or FreeBASIC.
Why did you decide to choose Pascal as a programming language and SDL/SDL2 as a library for these projects?
Cybermonkey: I started programming back in the 1980s with the Commodore 64 and BASIC. I learned Turbo Pascal in school and started programming with FreePascal a few years ago. It’s the language I have the most experience with. Not to mention that the FreePascal compiler is well maintained. I chose SDL/SDL2 because of its cross platform capabilities.
What do you think is the most interesting Pascal/SDL/SDL2 project out there (besides of your own, of course :-D)?
Cybermonkey: Actually I don’t know of any other … But of course the most impressive Pascal project is Lazarus for me.
Are there any further steps for EGSL and/or Pulsar2D or any new projects planned? What will they be?
Cybermonkey: EGSL will not be developed any further. Pulsar2D wil be improved from time to time. My plans are to implement Box2D physics and easy handling of tiled based maps made with the Tiled editor. But this has no priority so it can take a long time…
At the moment I am developing a little BASIC interpreter called “AllegroBASIC”. It’s a C project, though. (The editor, however, is made with Lazarus…) Since I am using Allegro4 libs which are obsolete now, I am porting at the same time the project to SDL2 which will be named “RETROBASIC”. If there are people interested in AllegroBASIC, have a look at allegrobasic.pulsar2d.org.
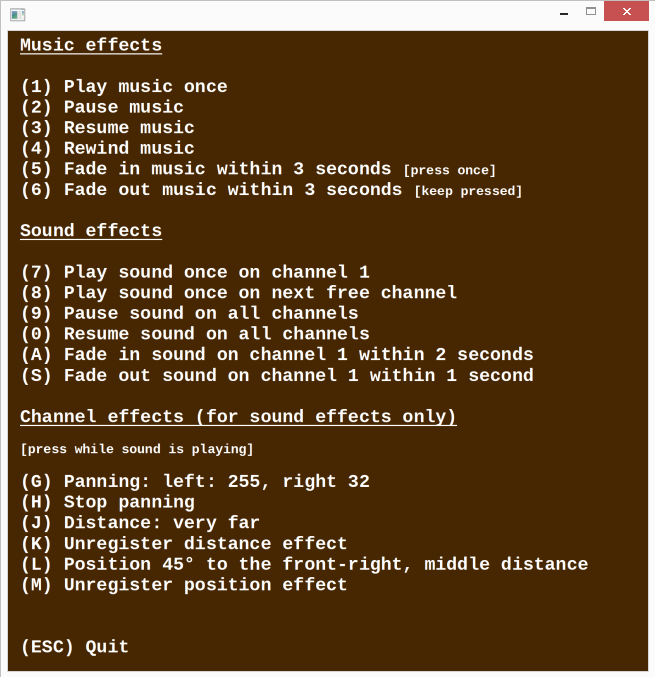
This chapter will introduce you on how to load music and sounds since these are key features of every game and many applications.
SDL_mixer 2.0 for easy music and sound support
Although SDL 2.0 supports music and sound handling natively, there is an easier way to play music and sound files. The official unit SDL_mixer 2.0 (unit’s name SDL2_mixer) has been created exactly for this purpose and is maintained by the same authors (Sam Lantinga, Stephane Peter, Ryan Gordon) as SDL 2.0 itself. The Pascal translation is fortunately available, too in Tim Blume’s header translations.
A simple bitmap image file which displays the menu options for the tutorial program.
You should extract the zip-file and get several files. These are four license text files and a readme text file, furthermore you have eight dll files including the important SDL2_mixer.dll. The other dll files are necessary to play the different sound and music formats. Copy all the files to the Windows system32-folder (or the corresponding place). If you forget this and run the examples below you will get an error with exitcode = 309.
Now that you are prepared, let’s have an overview of the code.
program SDL_MusicSound;
uses SDL2, SDL2_mixer;

var
  sdlWindow: PSDL_Window;
  sdlRenderer: PSDL_Renderer;
  sdlSurface: PSDL_Surface;
  sdlTexture: PSDL_Texture;
  sdlKeyboardState: PUInt8;
  Music: PMix_Music;
  Sound: PMix_Chunk;
  Run: Boolean = True;

begin
  if SDL_Init(SDL_INIT_VIDEO or SDL_INIT_AUDIO) < 0 then Exit;

  // Get window and renderer
  if SDL_CreateWindowAndRenderer(
    640, 640, SDL_WINDOW_SHOWN, @sdlWindow,@sdlRenderer) <> 0 then Exit;

  // Create and render menu texture
  sdlSurface := SDL_LoadBMP('music-menu.bmp');
  if sdlSurface = nil then Exit;
  sdlTexture := SDL_CreateTextureFromSurface(sdlRenderer, sdlSurface);
  if sdlTexture = nil then Exit;
  if SDL_RenderCopy(sdlRenderer, sdlTexture, nil, nil) <> 0 then Exit;
  SDL_RenderPresent(sdlRenderer);

  // Prepare mixer
  if Mix_OpenAudio(MIX_DEFAULT_FREQUENCY, MIX_DEFAULT_FORMAT,
    MIX_DEFAULT_CHANNELS, 4096) < 0 then Exit;

  // Load music
  Music := Mix_LoadMUS('In-my-mind-1.ogg');
  if Music = nil then Exit;
  Mix_VolumeMusic(MIX_MAX_VOLUME);

  // Load sound
  Sound := Mix_LoadWAV('dial-1.wav');
  if Sound = nil then Exit;
  Mix_VolumeChunk(Sound, MIX_MAX_VOLUME);

  while Run = True do
  begin

    SDL_PumpEvents;
    sdlKeyboardState := SDL_GetKeyboardState(nil);

    // ESC pressed
    if sdlKeyboardState[SDL_SCANCODE_ESCAPE] = 1 then
      Run := False;

    // Music effect keys
    if sdlKeyboardState[SDL_SCANCODE_1] = 1 then
      if Mix_PlayMusic(Music, 0) < 0 then Writeln(SDL_GetError);
    if sdlKeyboardState[SDL_SCANCODE_2] = 1 then Mix_PauseMusic;
    if sdlKeyboardState[SDL_SCANCODE_3] = 1 then Mix_ResumeMusic;
    if sdlKeyboardState[SDL_SCANCODE_4] = 1 then Mix_RewindMusic;
    if sdlKeyboardState[SDL_SCANCODE_5] = 1 then
      if Mix_FadeInMusic(Music, 10, 3000) = 0 then Writeln(SDL_GetError);
    if sdlKeyboardState[SDL_SCANCODE_6] = 1 then
      if Mix_FadeOutMusic(3000) = 0 then Writeln(SDL_GetError);

    // Sound effect keys
    if sdlKeyboardState[SDL_SCANCODE_7] = 1 then
      if Mix_PlayChannel(1, Sound, 0) < 0 then Writeln(SDL_GetError);
    if sdlKeyboardState[SDL_SCANCODE_8] = 1 then
      if Mix_PlayChannel(-1, Sound, 0) < 0 then Writeln(SDL_GetError);
    if sdlKeyboardState[SDL_SCANCODE_9] = 1 then Mix_Pause(-1);
    if sdlKeyboardState[SDL_SCANCODE_0] = 1 then Mix_Resume(-1);
    if sdlKeyboardState[SDL_SCANCODE_A] = 1 then
      if Mix_FadeInChannel(1, sound, 0, 2000) < 0 then Writeln(SDL_GetError);
    if sdlKeyboardState[SDL_SCANCODE_S] = 1 then
      if Mix_FadeOutChannel(1, 1000) < 0 then Writeln(SDL_GetError);

    // Channel effect keys
     if sdlKeyboardState[SDL_SCANCODE_G] = 1 then
       if Mix_SetPanning( 1, 255, 32 ) = 0 then Writeln(SDL_GetError);
     if sdlKeyboardState[SDL_SCANCODE_H] = 1 then
       if Mix_SetPanning( 1, 255, 255 ) = 0 then Writeln(SDL_GetError);
     if sdlKeyboardState[SDL_SCANCODE_J] = 1 then
       if Mix_SetDistance( 1, 223 ) = 0 then Writeln(SDL_GetError);
     if sdlKeyboardState[SDL_SCANCODE_K] = 1 then
       if Mix_SetDistance( 1, 0 ) = 0 then Writeln(SDL_GetError);
     if sdlKeyboardState[SDL_SCANCODE_L] = 1 then
       if Mix_SetPosition( 1, 45, 127 ) = 0 then Writeln(SDL_GetError);
     if sdlKeyboardState[SDL_SCANCODE_M] = 1 then
       if Mix_SetPosition( 1, 0, 0 ) = 0 then Writeln(SDL_GetError);

  end;

  // Clean up
  if Assigned(sdlSurface) then SDL_FreeSurface(sdlSurface);
  if Assigned(sdlTexture) then SDL_DestroyTexture(sdlTexture);
  if Assigned(sdlRenderer) then SDL_DestroyRenderer(sdlRenderer);
  if Assigned(sdlWindow) then SDL_DestroyWindow(sdlWindow);
  if Assigned(Music) then Mix_FreeMusic(Music);
  if Assigned(Sound) then Mix_FreeChunk(Sound);

  Mix_CloseAudio;
  SDL_Quit;
end.
When running this program, you’ll get a window with a menue. For this to work, make sure to download the music-menu.bmp file and place it in the program folder.
Let’s start with the first part of the code.
program SDL_MusicSound;
uses SDL2, SDL2_mixer;

var
  sdlWindow: PSDL_Window;
  sdlRenderer: PSDL_Renderer;
  sdlSurface: PSDL_Surface;
  sdlTexture: PSDL_Texture;
  sdlKeyboardState: PUInt8;
  Music: PMix_Music;
  Sound: PMix_Chunk;
  Run: Boolean = True;

begin
  if SDL_Init(SDL_INIT_VIDEO or SDL_INIT_AUDIO) < 0 then Exit;

  // Get window and renderer
  if SDL_CreateWindowAndRenderer(
    640, 640, SDL_WINDOW_SHOWN, @sdlWindow,@sdlRenderer) <> 0 then Exit;

  // Create and render menu texture
  sdlSurface := SDL_LoadBMP('music-menu.bmp');
  if sdlSurface = nil then Exit;
  sdlTexture := SDL_CreateTextureFromSurface(sdlRenderer, sdlSurface);
  if sdlTexture = nil then Exit;
  if SDL_RenderCopy(sdlRenderer, sdlTexture, nil, nil) <> 0 then Exit;
  SDL_RenderPresent(sdlRenderer);
The program is called “SDL”. It uses the SDL2 and the new SDL2_mixer unit.
We’re going to use event handling as discussed in Chapter – Keyboard State and Key States to check what keys have been pressed. Consequently we need a variable “sdlWindow” for the SDL 2.0 window and a keyboard state variable “sdlKeyboardState”.
The pointer variable “Music” is of the new type PMix_Music and points at the loaded music file data later. The “Sound” pointer variable is of type PMix_Chunk and points at the loaded sound file data later. Note: Each song is referenced by an own PMix_Music pointer and each sound effect (e.g. explosions, shots, …) is referenced by an own PMix_Chunk pointer.
What is the difference between music and sound?
Music is associated with PMix_Music pointers and sounds are associated with PMix_Chunk pointers, but why distinguish them at all? – Well, it is convenient to have them separated since they have rather different properties. Music is usually several minutes long, sounds are usually just a few seconds short. It is usually just one song played at a time, sounds need to mix up if necessary. For music it usually doesn’t plays a role if it is sligthly delayed to when it should start, for sounds a larger delay usually means a strange feeling for the player. So, for music there is exactly one channel reserved where the music is played. For sounds eight sound channels are available to make it possible for them to mix up. Now let’s get back to the code.
The variable “Run” is a boolean variable to determine when the main loop of the program should be exited.
The program is initialized by SDL_Init as known. Note though that not only SDL_INIT_VIDEO but additionally SDL_INIT_AUDIO is set. They are combined by the or operator (not the and operator :-)!). The window is set up afterwards by SDL_CreateWindow as known. Also the menu texture file is created and renderered as known. Check Chapter – Loading and rendering a Bitmap file as a reminder, in case.
  // Prepare mixer
  if Mix_OpenAudio(MIX_DEFAULT_FREQUENCY, MIX_DEFAULT_FORMAT,
    MIX_DEFAULT_CHANNELS, 4096) < 0 then Exit;

  // Load music
  Music := Mix_LoadMUS('In-my-mind-1.ogg');
  if Music = nil then Exit;
  Mix_VolumeMusic(MIX_MAX_VOLUME);

  // Load sound
  Sound := Mix_LoadWAV('dial-1.wav');
  if Sound = nil then Exit;
  Mix_VolumeChunk(Sound, MIX_MAX_VOLUME);
To initialize SDL2_mixer
function Mix_OpenAudio(frequency: cint; format: cuint16; channels: cint; chunksize: cint): cint
has to be called. It requests four parameters. These are the frequency, the audio format, the channels (mono or audio) and the chunksize. All these parameters are of Integer type. Function Mix_OpenAudio returns 0 on success and -1 on errors.
The frequency in Hertz (1/s) usually is 22050 Hz or MIX_DEFAULT_FREQUENCY in games but double as high for CD quality sound (44100 Hz). The higher the frequency, the more CPU power is needed.
Next we have to define the audio format. It determines how the audio data is stored. MIX_DEFAULT_FORMAT equals AUDIO_S16SYS. Different values are given in the following list (from official SDL2_mixer documentation):
Format constant name Description
AUDIO_U8 Unsigned 8-bit samples
AUDIO_S8 Signed 8-bit samples
AUDIO_U16LSB Unsigned 16-bit samples, in little-endian byte order
AUDIO_S16LSB Signed 16-bit samples, in little-endian byte order
AUDIO_U16MSB Unsigned 16-bit samples, in big-endian byte order
AUDIO_S16MSB Signed 16-bit samples, in big-endian byte order
AUDIO_U16 same as AUDIO_U16LSB (for backwards compatability probably)
AUDIO_S16 same as AUDIO_S16LSB (for backwards compatability probably)
AUDIO_U16SYS Unsigned 16-bit samples, in system byte order
AUDIO_S16SYS Signed 16-bit samples, in system byte order
Then we decide for a sound channel type, which means either stereo or mono. For stereo sound we choose 2 and for mono we choose 1 as value. MIX_DEFAULT_CHANNELS equals stereo output.
Finally the chunksize has to be set, where 4096 bytes per sample is a good and default value. Too low values may lead to skipping samples. Too high values may lead to delayed playing.
Loading music and sounds from files in SDL 2.0
We will load the music by
function Mix_LoadMUS(_file: PAnsiChar): PMix_Music.
_file can be the absolute path. If the Pascal file and the music file are in the same folder the file name is sufficient (as shown in the example). If the loading was unsuccessful, the function returns nil. The volume can be set by
function Mix_VolumeMusic(volume: cint): cint.
The volume can be set between 0 (silence) to 128 (maximum volume). The latter equals MIX_MAX_VOLUME. By the way, if you set -1 as argument, the return value corresponds to the set volume.
Quite similar sound files are loaded by
function Mix_LoadWAV(_file: PAnsiChar): PMix_Chunk.
Although the function’s name doesn’t indicate this, use this function to load the sound files of any format (Wave, Aiff, Riff, Ogg, Voc), not only for .wav sound files. It return nil on error. There is alittle difference when setting the volume by
function Mix_VolumeChunk(chunk: PMix_Chunk; volume: cint): cint.
Instead of just setting a general volume, the volume is bound to a certain sound. In the example case the sound is in variable “sound”. Just to mention it here, there is a third possibility, to set the volume for a certain channel:
function Mix_Volume(channel: cint; volume: cint): cint.
This can be quite handy, anyway, channels are discussed a little bit later below. If your argument is -1 the average volume will be returned.
Playing, pausing, resuming music and sounds
  while Run = True do
  begin

    SDL_PumpEvents;
    sdlKeyboardState := SDL_GetKeyboardState(nil);

    // ESC pressed
    if sdlKeyboardState[SDL_SCANCODE_ESCAPE] = 1 then
      Run := False;

    // Music effect keys
    if sdlKeyboardState[SDL_SCANCODE_1] = 1 then
      if Mix_PlayMusic(Music, 0) < 0 then Writeln(SDL_GetError);
    if sdlKeyboardState[SDL_SCANCODE_2] = 1 then Mix_PauseMusic;
    if sdlKeyboardState[SDL_SCANCODE_3] = 1 then Mix_ResumeMusic;
    if sdlKeyboardState[SDL_SCANCODE_4] = 1 then Mix_RewindMusic;
    if sdlKeyboardState[SDL_SCANCODE_5] = 1 then
      if Mix_FadeInMusic(Music, 10, 3000) = 0 then Writeln(SDL_GetError);
    if sdlKeyboardState[SDL_SCANCODE_6] = 1 then
      if Mix_FadeOutMusic(3000) = 0 then Writeln(SDL_GetError);

    // Sound effect keys
    if sdlKeyboardState[SDL_SCANCODE_7] = 1 then
      if Mix_PlayChannel(1, Sound, 0) < 0 then Writeln(SDL_GetError);
    if sdlKeyboardState[SDL_SCANCODE_8] = 1 then
      if Mix_PlayChannel(-1, Sound, 0) < 0 then Writeln(SDL_GetError);
    if sdlKeyboardState[SDL_SCANCODE_9] = 1 then Mix_Pause(-1);
    if sdlKeyboardState[SDL_SCANCODE_0] = 1 then Mix_Resume(-1);
    if sdlKeyboardState[SDL_SCANCODE_A] = 1 then
      if Mix_FadeInChannel(1, sound, 0, 2000) < 0 then Writeln(SDL_GetError);
    if sdlKeyboardState[SDL_SCANCODE_S] = 1 then
      if Mix_FadeOutChannel(1, 1000) < 0 then Writeln(SDL_GetError);
The main application loop is entered and should be left if variable “Run” is false which is achieved by pressing the ESCAPE key.
For each key state a different music or sound related function is used to do something. Let’s discuss them now in detail. We start with the functions triggered by the keys 1 – 4:
function Mix_PlayMusic(music: PMix_Music; loops: cint): cint
procedure Mix_PauseMusic
procedure Mix_ResumeMusic
procedure Mix_RewindMusic
Mix_PlayMusic plays music. The first argument is the music itself which we previously got from the example .ogg music file and associated with the “Music” pointer of PMix_Music type. The second argument determines how often the music is played. Additionally -1 means infinite repetition. This function returns 0 on success and -1 on error.
The meaning of the three procedures Mix_PauseMusic, Mix_ResumeMusic and Mix_RewindMusic ist obvious from their names. They are used to pause, resume (if paused before) and rewind the played music.
The analogous function and procedures for sound channels triggered by the keys 7 – 9 and 0 are shown now:
function Mix_PlayChannel(channel: cint; chunk: PMix_Chunk; loops: cint): cint
procedure Mix_Pause(channel: cint)
procedure Mix_Resume(channel: cint)
As you can see the function Mix_PlayChannel has three parameters. The first parameter asks for a channel with which the sound should be associated. SDL2_mixer provides eight sound channels. Usually you should use -1 which means the first free channel will be used to play the sound. Anyway, you could specifiy a certain channel here if you like. The second parameter asks for a sound pointer of PMix_Chunk type. The third parameter is the same as for music, -1 means an infinite loop. Attention though for specific repetitions. The value for loops is increased by 1. So, if you want a sound to be played once, you need the argument to be 0. The return value corresponds to the sound channel the sound is played on, it is -1 on error.
The procedures Mix_Pause and Mix_Resume are self-explanatory. Use them to pause or resume a certain channel, which is the argument. If the argument is -1 (as in the example code) you pause or resume all channels. By the way, you may have noticed that there is not a rewind analogue, because sounds are not expected to be rewound.
Fading effects
...

    if sdlKeyboardState[SDL_SCANCODE_5] = 1 then
      if Mix_FadeInMusic(Music, 10, 3000) = 0 then Writeln(SDL_GetError);
    if sdlKeyboardState[SDL_SCANCODE_6] = 1 then
      if Mix_FadeOutMusic(3000) = 0 then Writeln(SDL_GetError);

    // Sound effect keys

...

    if sdlKeyboardState[SDL_SCANCODE_A] = 1 then
      if Mix_FadeInChannel(1, sound, 0, 2000) < 0 then Writeln(SDL_GetError);
    if sdlKeyboardState[SDL_SCANCODE_S] = 1 then
      if Mix_FadeOutChannel(1, 1000) < 0 then Writeln(SDL_GetError);

    // Channel effect keys
     if sdlKeyboardState[SDL_SCANCODE_G] = 1 then
       if Mix_SetPanning( 1, 255, 32 ) = 0 then Writeln(SDL_GetError);
     if sdlKeyboardState[SDL_SCANCODE_H] = 1 then
       if Mix_SetPanning( 1, 255, 255 ) = 0 then Writeln(SDL_GetError);
     if sdlKeyboardState[SDL_SCANCODE_J] = 1 then
       if Mix_SetDistance( 1, 223 ) = 0 then Writeln(SDL_GetError);
     if sdlKeyboardState[SDL_SCANCODE_K] = 1 then
       if Mix_SetDistance( 1, 0 ) = 0 then Writeln(SDL_GetError);
     if sdlKeyboardState[SDL_SCANCODE_L] = 1 then
       if Mix_SetPosition( 1, 45, 127 ) = 0 then Writeln(SDL_GetError);
     if sdlKeyboardState[SDL_SCANCODE_M] = 1 then
       if Mix_SetPosition( 1, 0, 0 ) = 0 then Writeln(SDL_GetError);

  end;
Important to know about effects like fading. They are performed on the fly to your data, so the more effects you use, the more computational power they require. It is important to unregister effects you don’t need anymore.
These are the four fade functions triggered by the keys 5, 6, A and S :
function Mix_FadeInMusic(music: PMix_Music; loops: cint; ms: cint): cint
function Mix_FadeOutMusic(ms: cint): Integer
function Mix_FadeInChannel(channel: cint; chunk: PMix_Chunk; loops: cint; ms: cint): cint
function Mix_FadeOutChannel(which: cint; ms: cint): cint
The function Mix_FadeInMusic works the very same way as Mix_PlayMusic above, but there is a further parameter which allows for a fade in effect in milliseconds. 3000 milliseconds equals 3 seconds. It returns 0 on success and -1 on error.
Mix_FadeOutMusic fades out the playing music within the given time in milliseconds in the moment the function is called (hence the key is pressed in the example program). Attention, it returns 1 on success and 0 on error.
Quite similar the functions Mix_FadeInChannel and Mix_FadeOutChannel work. Instead of the music pointer, the sound pointer and the channel has to be given. By the way, also here the number of times the sound is played is increased by 1, so if you want to play a sound with fade in effect once, the argument has to be 0. The fade effect applies only for the first run. Both functions return 0 on success and -1 on error.
Panning and distance effects
The functions triggered by the keys G – M are:
function Mix_SetPanning(channel: cint; left: cuint8; right: cuint8): cint
For setting the panning you need the channel to which panning should be applied and the volume values which may vary from 0 (quiet) to 255 (loudest). For a consistent panning effect you may substract the left value from the right value (left: volume, right: 255-volume). To unregister this effect, you should set both values to 255, which is recommended to be done if you don’t need panning anymore. The function returns 0 on errors.
function Mix_SetDistance(channel: cint; distance: cuint8): cint
The higher the distance, the quieter the sound appears. The value can range between 0 (near) and 255 (far). If distance is set to 0 the effect is unregistered. It returns 0 on errors.
function Mix_SetPosition(channel: cint; angle: cint16; distance: cuint8): cint
This function adjusts volumes according to an angle and a distance value, hence it combines the effects of the two functions discussed before for panning and distance. The distance value works the same way as discussed for Mix_SetDistance. Angle of 0 (degree) means in front of you, 90 means directly to the right, 180 means directly behind, 270 means directly to the left.
Closing the SDL2 mixer and clean up
  // Clean up
  if Assigned(sdlSurface) then SDL_FreeSurface(sdlSurface);
  if Assigned(sdlTexture) then SDL_DestroyTexture(sdlTexture);
  if Assigned(sdlRenderer) then SDL_DestroyRenderer(sdlRenderer);
  if Assigned(sdlWindow) then SDL_DestroyWindow(sdlWindow);
  if Assigned(Music) then Mix_FreeMusic(Music);
  if Assigned(Sound) then Mix_FreeChunk(Sound);

  Mix_CloseAudio;
  SDL_Quit;
end.
For the clean up the surface, textre renderer and the window are destroyed as known. New are the procedures Mix_FreeMusic and Mix_FreeChunk to free the music and sound data.
procedure Mix_FreeMusic(music: PMix_Music)
procedure Mix_FreeChunk(chunk: PMix_Chunk)
The arguments have to be the music and sound pointer respectively.
SDL_mixer 2.0 has to be closed by
procedure Mix_CloseAudio.
Finally SDL 2.0 and the application are shut down as known.
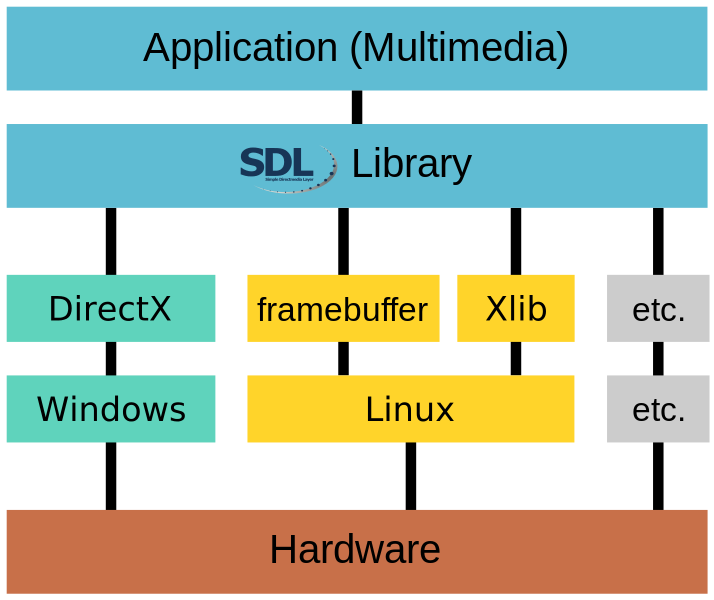
SDL abbreviates Simple Direct Media Layer. In August 2013 the official successor of original SDL (SDL 1.2) has been released, simply called SDL2 (or SDL 2.0). It is a library to develop powerful applications for many different operating systems (platforms) by learning only one set of commands. This is called cross-platform development. The following platforms are officially supported by SDL2:
Windows
Mac OS X
Linux
iOS
Android.
Internally the SDL library layer translates your commands to the platform specific commands, which is reflected by the following diagram.
Image by Adriatikus at English Wikipedia [Public domain], Wikimedia SDL2 Layer Diagram
It’s especially meaningful to use the SDL library if you plan to develop games or need fast paced rendering. Jump and run-, Role-playing-, Real time/turn based strategy-, side-scrolling-, arcade-, board-, card-, simulation-, multi-user dungeon-, puzzle-, shooter-, network games and so on are possible, and any combination of these ;-).
Licensing
The SDL2 library, as well as the Pascal units for using SDL2, are licensed under the zlib license. This license grants a high degree of freedom. So even closed-source, commercial games are possible. As a sidenote, you are free to choose the MPL license for the units, if you like.
How to get SDL2 for Free Pascal or Object Pascal?
There are several SDL2 units out there (see comparison and discussion here) which provide bindings for Pascal to use SDL2, since originally SDL2 has been written in C. Over time it turned out that the PGD community SDL2 units are the best choice to use if you like to get into SDL2 development in Free Pascal or Object Pascal (Delphi). They are updated regularly.
A detailed installation instruction to set your system up for SDL2 development under Pascal is found in Chapter 2 for Windows or Linux. If you did install SDL2 for Free Pascal or Object Pascal already, proceed to Chapter 3. Please choose:
installation guide for SDL 2.0 under Microsoft Windows
installation of Free Pascal Compiler (FPC)
installation of Free Pascal IDE and Lazarus IDE
installation of SDL 2.0
configuration of FP IDE and Lazarus IDE to work with SDL 2.0
after this you are ready to code awesome SDL 2.0 stuff 🙂
Free Pascal IDE or Lazarus IDE
IDE stands for integrated development environment. Although you could write your programs in a simple text editor, an IDE makes your life much easier. For example, it highlights keywords, makes it easier for you to set up the compiler, and much more. Now let’s have a look at these two IDEs:
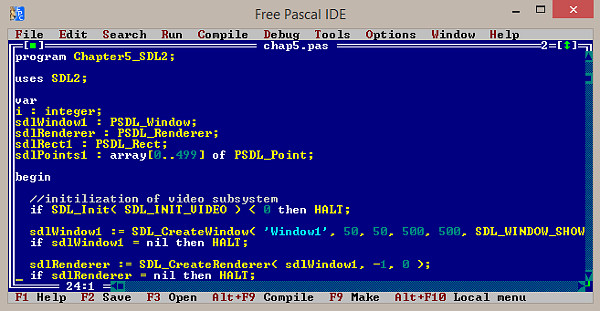
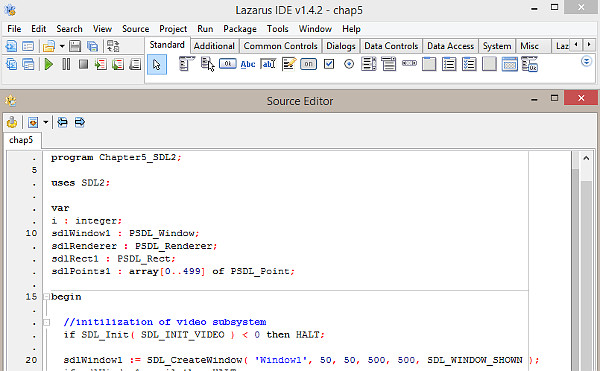
Free Pascal IDE
Lazarus IDE
You may notice that the native Free Pascal IDE (left) looks old, but it is shipped right along with the Free Pascal Compiler. In contrast to that the Lazarus IDE (right) looks up-to-date, but requires it to be installed additionally. My advise is nonetheless, use the Lazarus IDE.
The Free Pascal Compiler (FPC)
We need three different software packages. First of all we need the stand-alone Free Pascal Compiler or Lazaruse IDE (which already has a copy of the Free Pascal Compiler included). If you are not sure, I recommend to go with the Lazarus IDE package.
SDL Library and SDL 2.0 units
Additionaly we need the original SDL library files (.dll files). And finally we need units that connect our SDL 2.0 code written in Free Pascal to the SDL library files. The latter will be done by SDL 2.0 units.
This table provides all information and sources you need with respect to installation steps 1) – 3). Keep in mind, you have to download either the Lazarus IDE or the stand-alone Free Pascal Compiler, not both.
On the right upper side is a button saying Download ZIP. Click on this button for the download of the latest release. *Better go with the latest availabe version (not version 1.72!) since some important bugfixes have been made lately.
SDL 2.0 > Download > Choose the download suitable for your system.
Download Lazarus or the stand-alone Free Pascal Compiler (FPC)
If you have Free Pascal or the Lazarus IDE installed already, you can skip the steps 1a) and 1b).
1a)For Lazarus IDE: Download the latest version of the Lazarus IDE. It has the Free Pascal Compiler accompanied. Remark: As of today (12/02/2016) the bundle doesn’t provide the most recent Free Pascal Compiler (3.0.0) but the version before (2.6.4). The tutorial examples will work with both versions though.
1b) For Free Pascal IDE: 32 bit Windows: Download the latest stable Free Pascal compiler, version 3.0.0 or higher. 64 bit Windows: You have two choices, 1) Simple way: Go with the 32 bit version of Free Pascal. (Recommended), 2) Install the 64 bit version of Free Pascal on top of the 32 bit version of Free Pascal. In this case you need both files. Hence, you need to download both Free Pascal installers shown above.
Download SDL 2.0 and Header translation
2) Download the latest version of Tim Blume’s SDL 2.0 units, better go with the latest branch (master branch), and do not use version 1.72 since it contains some bugs. Click on “Clone or download” and then on “Download ZIP” (see arrows in image below) of the page and make sure that Branch: master (not v1.72!) is chosen at the left side (see arrow in image below). This is important for any operating system: Windows, Linux, Mac OS X.
Choose the master branch (1), click on “Clone or download” (2) and click on Download ZIP (3).
3) Download the latest version of SDL 2.0 runtime library, version 2.0.4 or higher.
Install Lazarus or the Free Pascal Compiler
4a) For Lazarus: 32 and 64 bit Windows: Execute lazarus-1.4.4-fpc-2.6.4-win32.exe to install Lazarus for a 32 bit or 64 bit Windows system and follow the self-installer. Let the self-installer create a shortcut on your desktop.
4b) For Free Pascal IDE:32 and 64 bit Windows: Execute fpc-2.6.4.i386-win32.exe to install Free Pascal for a 32 bit or 64 bit Windows system. Let the self-installer create a shortcut on your desktop. Don’t modify any checked options during installation process. The default path is: C:\FPC\[Compiler version]\. [Compiler version] should be 3.0.0 or higher numbers. 64 bit Windows only: After you installed the 32 bit Free Pascal, you may execute fpc-3.0.0.i386-win32.cross.x86_64-win64.exe optionally to add the 64 bit version on top.
Install SDL 2.0 and Header translation
5) Extract SDL2-2.0.4-win32-x86.zip or SDL2-2.0.4-win32-x64.zip to get the SDL runtime library. This leads to two extracted files. There is a text file and the very important SDL2.dll.
6) 32bit Windows: Copy those files (especially the SDL2.dll!) to your system32-folder, C:\WINDOWS\system32\. 64bit Windows: Copy those 64bit files to your system32-folder (!), C:\WINDOWS\system32\, Windows is expecting you to do this. Do not use the SysWoW64-folder (Hint: 32 bit files on 64 bit Windows go here).
If it is not possible to copy the files into this folder (or you are unsure about its location) alternativly you can copy the SDL2.dll right into the same folder where the SDL 2.0 application (.exe) is located. That is because SDL 2.0 first looks for the SDL2.dll in the folder from which it is executed and if it isn’t found there, in the corresponding system folder! Anyway, if it isn’t found anywhere, the program will raise an error.
Now you have installed Free Pascal and the SDL runtime library on your system. Finally SDL 2.0 units have to be installed.
7a) For Lazarus IDE: Extract the SDL2-for-Pascal-master.zip. The Free Pascal Compiler is located in a subfolder called “fpc”. I suggest to copy all the files to a folder with full path C:\Lazarus\fpc\[Compiler Version]\units\SDL2\. [Compiler version] should be 2.6.4 or higher numbers. Skip step 7b).
7b) For Free Pascal IDE: Extract the SDL2-for-Pascal-master.zip. I suggest to copy all the files to a folder with full path C:\FPC\[Compiler Version]\units\SDL2\. [Compiler version] should be 3.0.0 or higher numbers. All later chapters will assume you installed to this path.
Configuring the Lazarus IDE
Now the compiler has to be told where to find the new units.
8) Open the Free Pascal IDE (for example by clicking the shortcut on desktop).
9) In Lazarus the path to external units has to be set for each project. Create a project if no project is set up (Project > New Project …). In the menue choose the following item Project > Project Options …. Now a window should pop up.
10) Under “Compiler Options” choose “Paths” (see red mark). Choose the three dots button (see red mark on the right side) for the “Other units files (-Fu)” field (red mark). This makes the “Path Editor” pop up. In the area “Search paths:”, click on the yellow folder symbol in the right bottom corner. Choose the path to your SDL-units (e.g. C:\Lazarus\2.6.4\units\SDL2). Make sure the path leads to the folder, where the sdl2.pas file is located! This file contains all the basic features of SDL 2.0.
Confirm by clicking “OK” until all windows are closed. Your Lazarus IDE is now set up for SDL 2.0 application development :-)!
Configuring the Free Pascal IDE (skip if you use Lazarus)
Now the compiler has to be told where to find the new units.
8) Open the Free Pascal IDE (for example by clicking the shortcut on desktop).
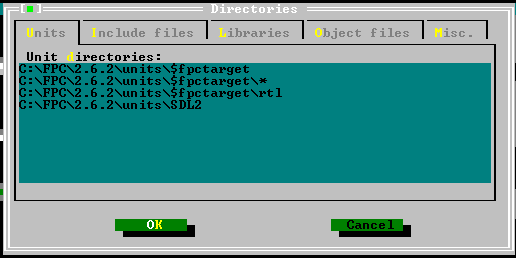
9) In the menue choose the following item Options > Directories…. Now a window should pop up.
10) The first tab whitin this new window is called “Units”. Here you add the full path to your SDL-units (e.g. C:\FPC\3.0.0\units\SDL2) right below the other paths. Leave the last backslash out. Make sure the path leads to the folder, where the sdl2.pas file is located! This file contains all the basic features of SDL 2.0.
Since the screenshot is old, the compiler version has been 2.6.2, which is reflected in the shown pathes. It should be 3.0.0 or higher numbers for you.
Confirm by clicking “OK”.
Finally
Congratulations! You have configured your system for developing SDL 2.0 applications with the Lazarus IDE or the Free Pascal IDE! Simple, isn’t it? 🙂
For those of you who try running a program and get an abortion together with a messege saying “exitcode = 309”: You skipped step 6! Did you copy the SDL2.dll to your system32- or system-folder respectively? If so and the error still occurs you should copy the SDL2.dll into the folder where the programs are placed. Now it should work.


